Using Kubernetes dashboard to deploy a Mule 4 application
Once you have a running Kubernetes cluster, you can deploy your containerised applications on top of it. In this post we will walk through how you can deploy a containerised mule application using the Kubernetes dashboard.
Prerequisites
To keep things simple, we will assume you have already setup a local single node Kubernetes cluster and deployed its dashboard.
Create a new Kubernetes deployment
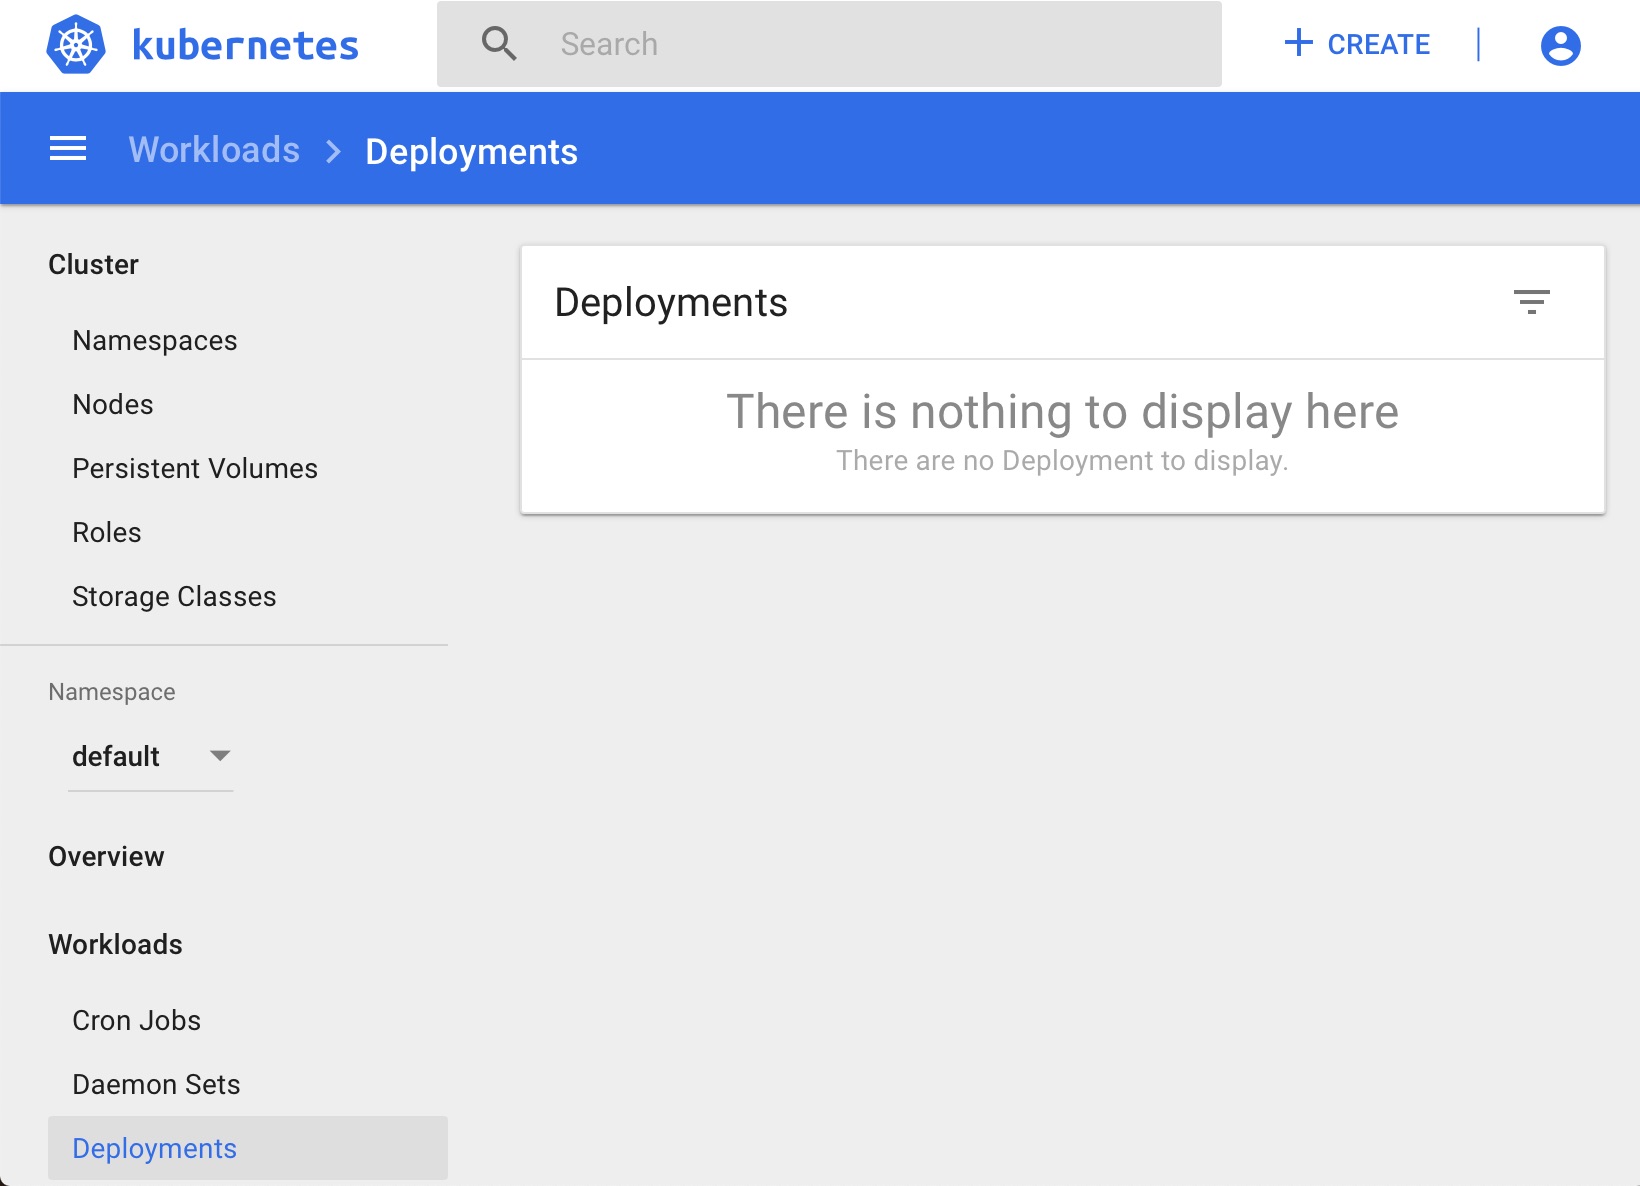
Begin by using your browser to navigate to the Kubernetes dashboard running on your local machine http://localhost:8001/api/v1/namespaces/kube-system/services/https:kubernetes-dashboard:/proxy/. Use the menu to the left of the page to open the Deployments screen:
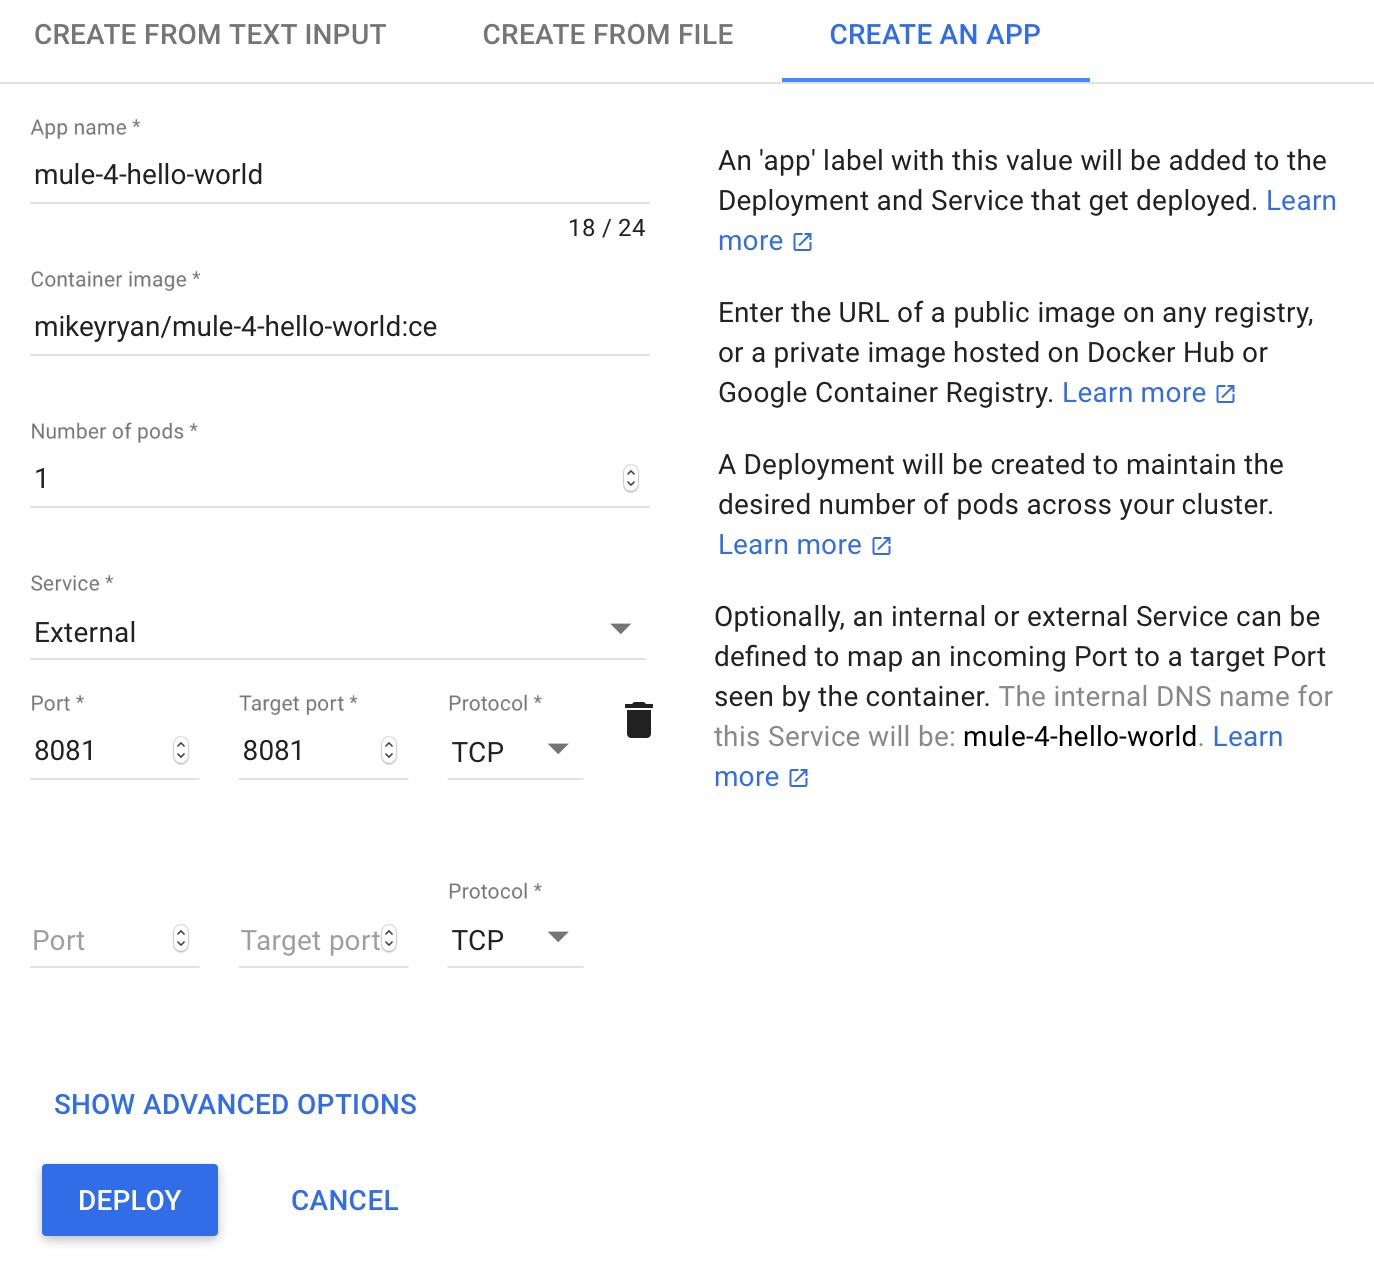
Then click the Create button in the top right hand corner. In the Wizard that appears, select the Create an App tab and provide the following values:
- app name: mule-4-hello-world
- container image: mikeyryan/mule-4-hello-world:ce
- number of pods: 1
- service: External
- port: 8081
- target port: 8081
- protocol: TCP
If you've been following on from earlier walkthroughs, or have your own containerised Mule application, feel free to replace the value for the container image. The image mikeyryan/mule-4-hello-world:ce is a a simple Hello World application for Mule 4. It has a single HTTP listener flow that listens on http://localhost:8081/api/hello-world and can be found on GitHub.
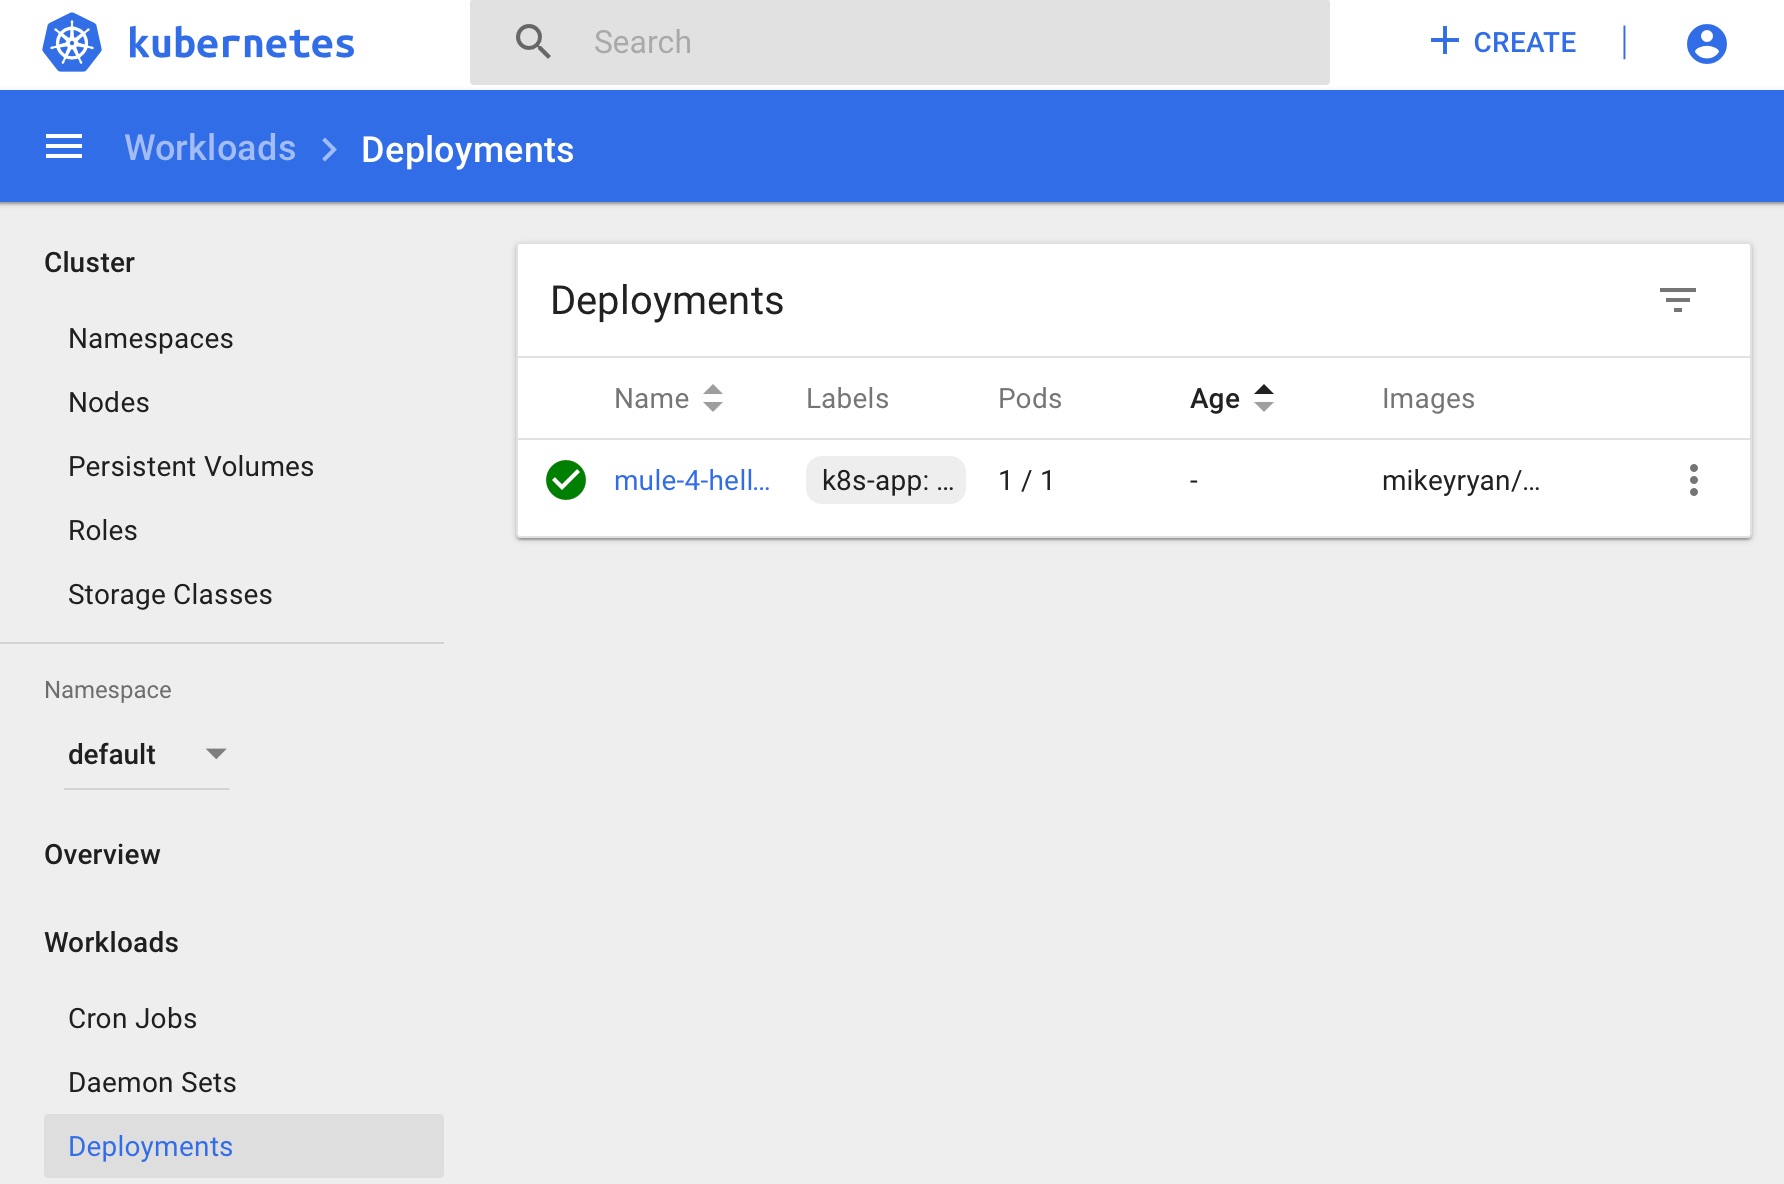
Finally, click the Deploy button. Once the deployment starts we can see the deployment name in the Dashboard on the Deployments screen:
To verify that the application has started successfully, you can use the menu to the left of the page to open the Pods screen:
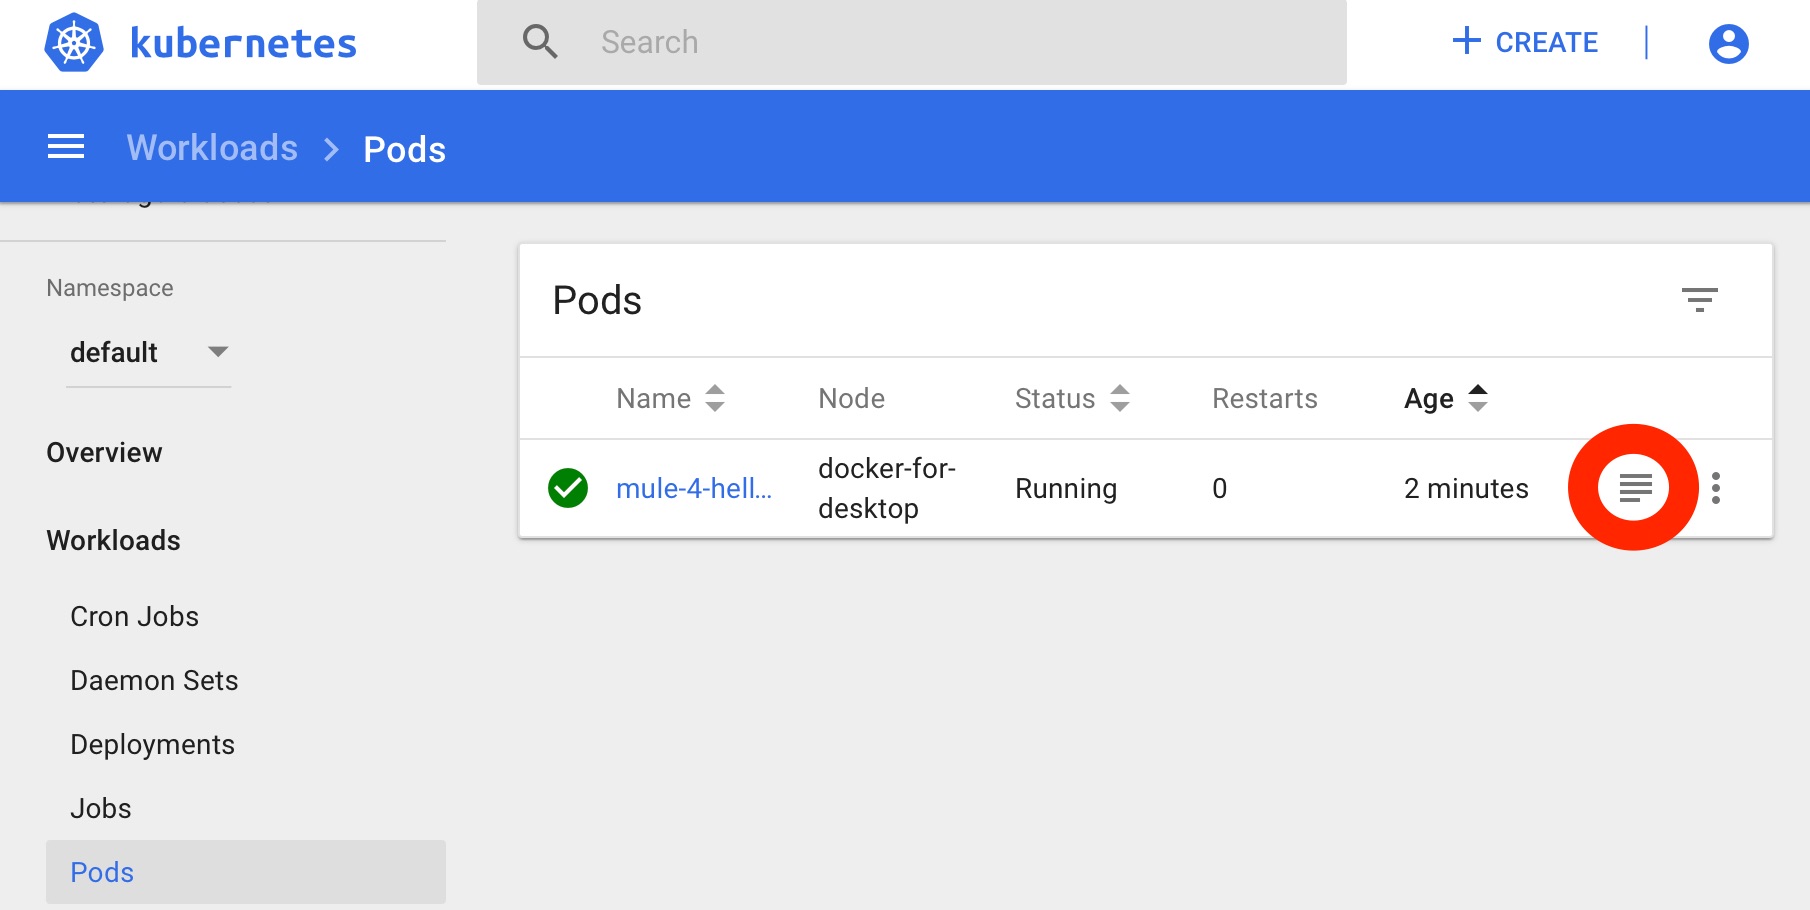
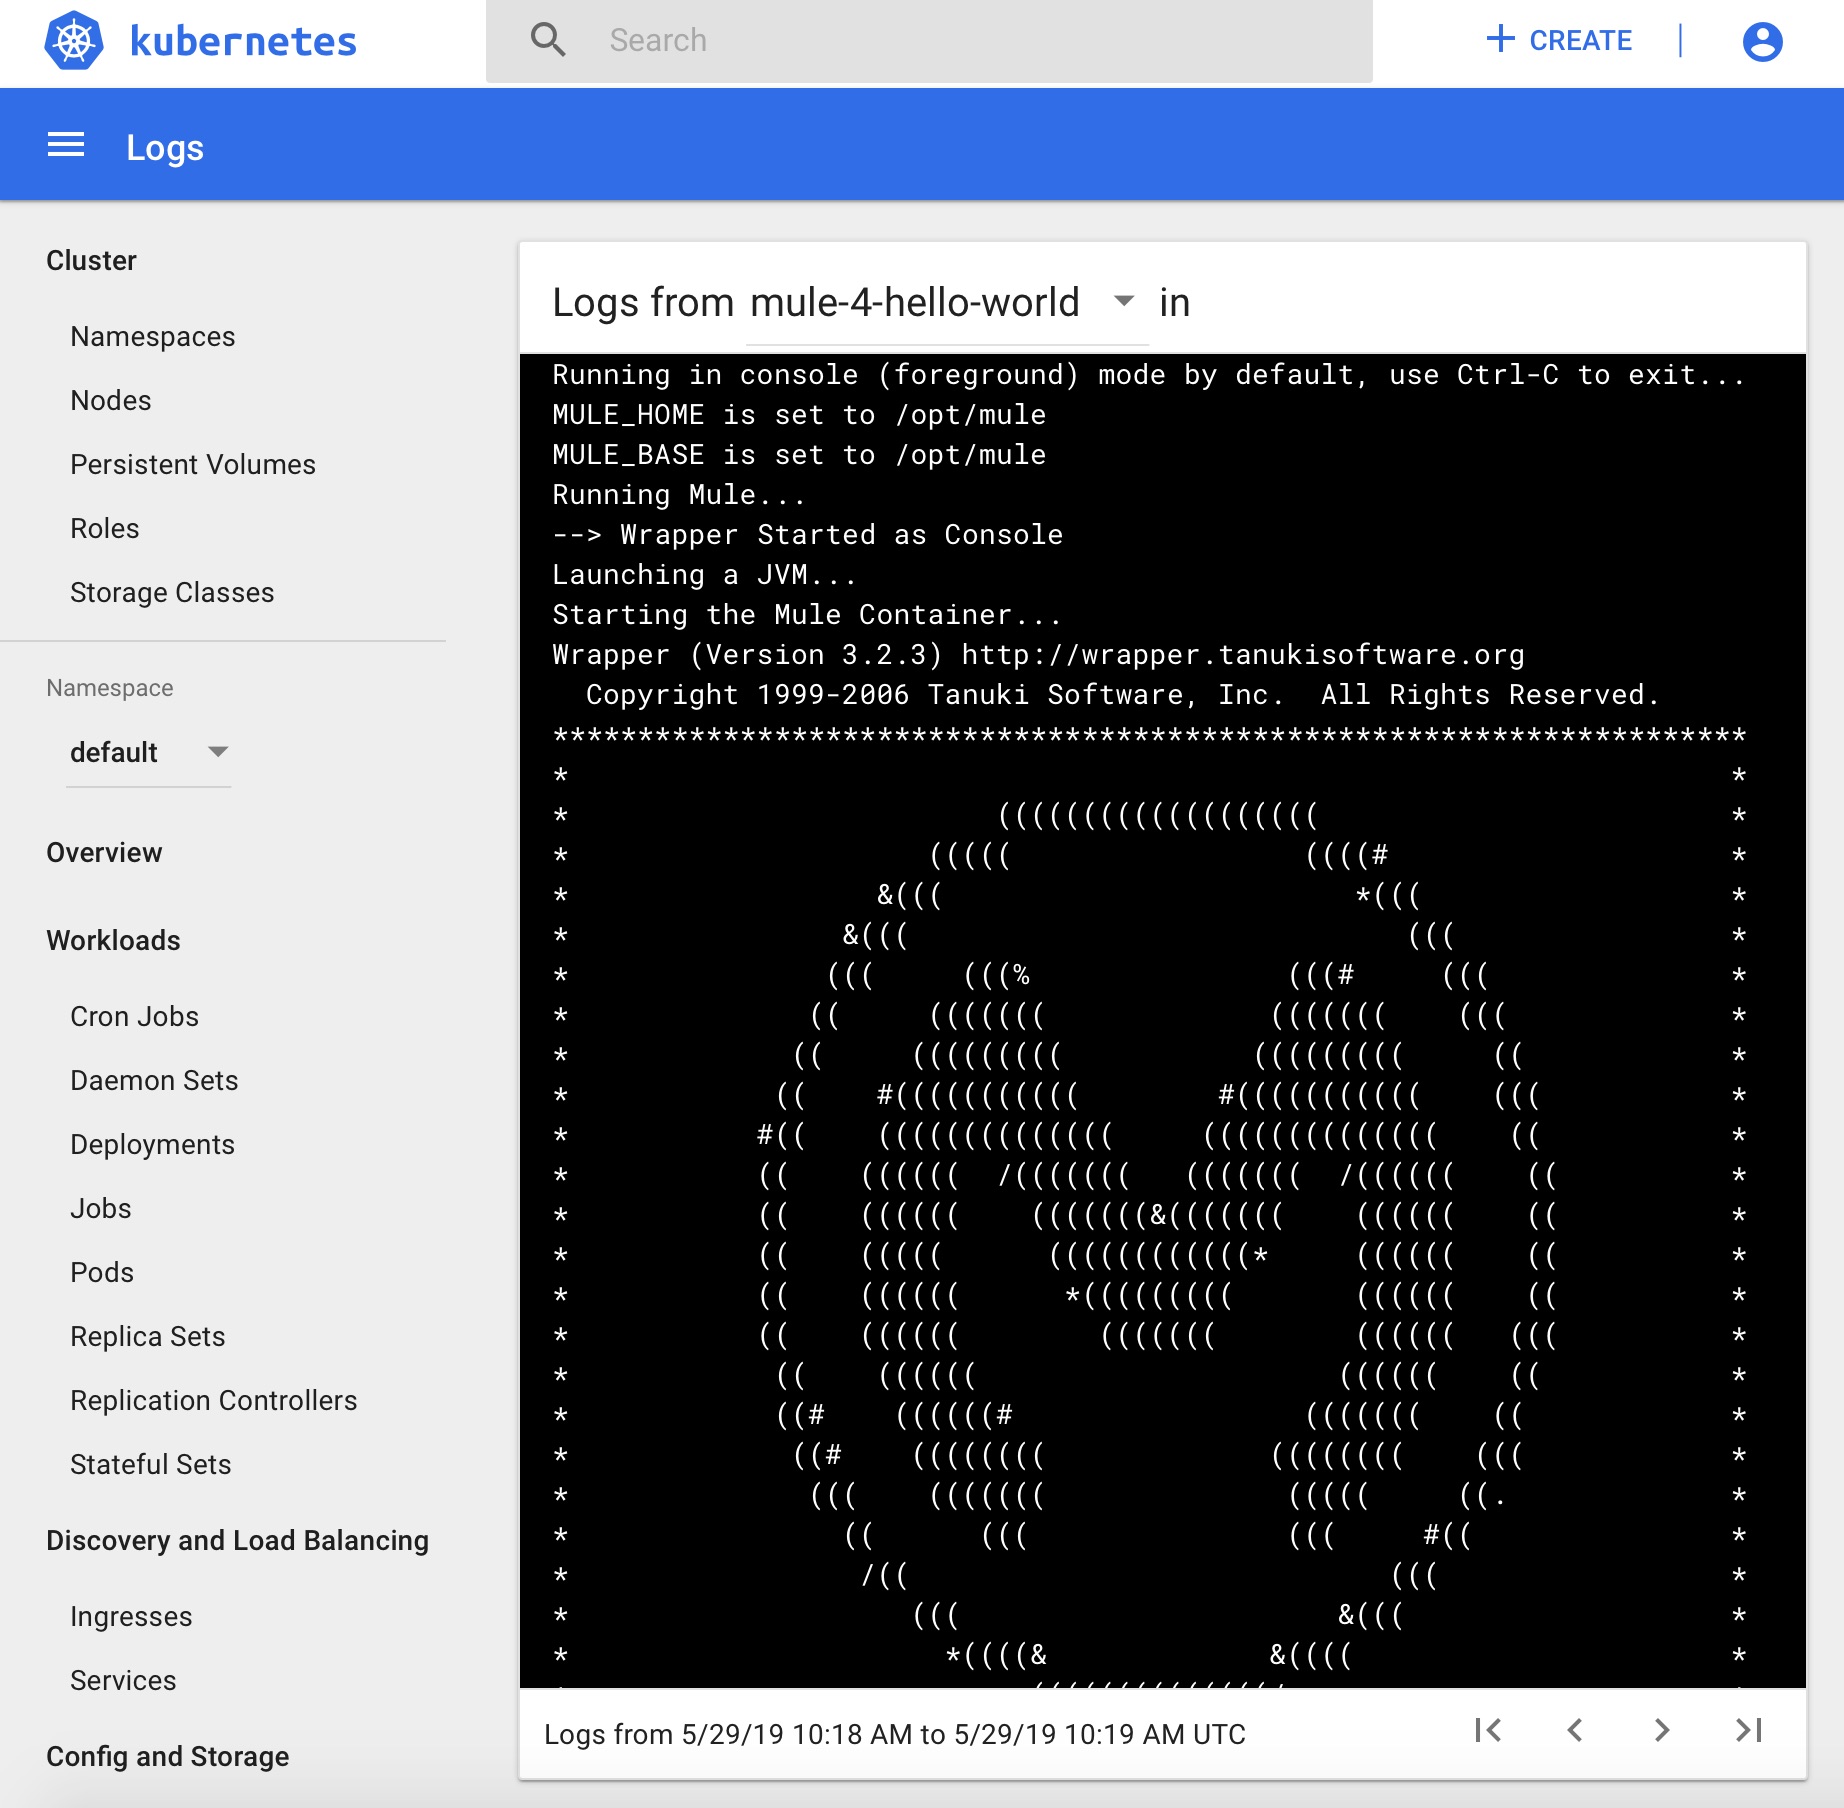
And click the circled icon to inspect the logs for the running mule-4-hello-world Docker container. You should see a screen similar to this:
Testing the application
Now that we have verified that the application has been deployed successfully, we are ready to test it. The containerised mule-4-hello-world application exposes an API endpoint on port 8081. When deploying the example using Kubernetes we chose to leave the port the same, but make it externally accessible. As such the application can be accessed by navigating to http://localhost:8081/api/hello-world in your browser. When accessed, your browser should show:
Hello from Mule 4.2.0
Summary
We have previously walked through how to containerise the Mule ESB as well as a Mule 4 application. Now we've demonstrated how easy it is deploy a containerised Mule 4 application using the Kubernetes dashboard. In future posts we will look at how this can be achieved using Kubectl.